
Introduction
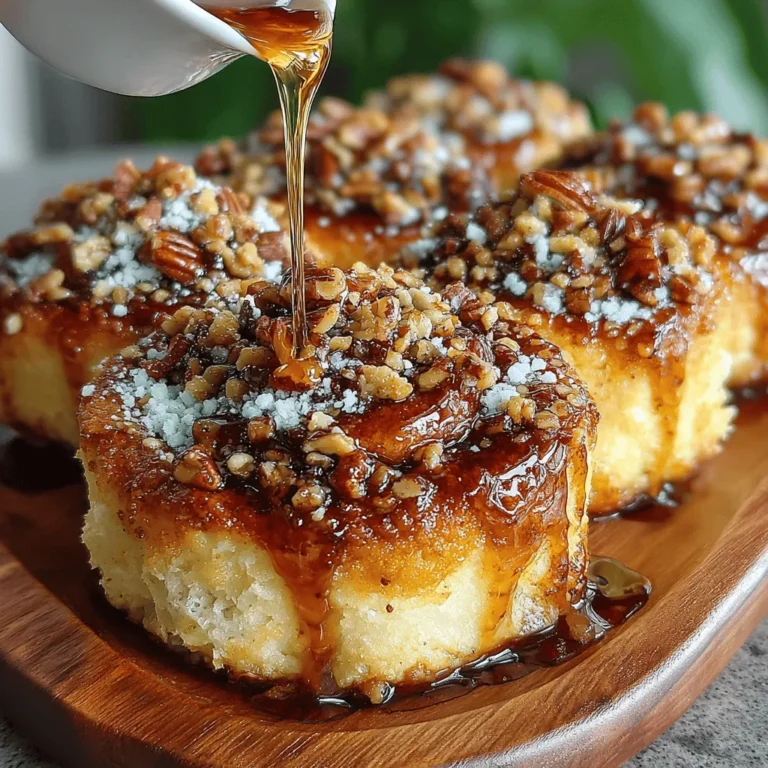
Step into your kitchen and prepare to embark on a delightful culinary adventure with the irresistible aroma of freshly baked Maple Pecan Cinnamon Rolls wafting through the air. These delectable rolls are not just a treat for the taste buds; they are an experience that embodies the warmth and comfort of home baking. Combining the rich, earthy flavors of maple syrup, the fragrant spice of cinnamon, and the delightful crunch of pecans, these cinnamon rolls are the perfect addition to any brunch table or a cozy breakfast spread.
In this article, we will guide you through the art of creating these fluffy, gooey rolls from scratch. You don’t need to be a seasoned baker to achieve that perfect rise and golden-brown crust. With a few essential ingredients and some patience, you can master the techniques that transform simple dough into a decadent treat.
Understanding the Ingredients
To create the best Maple Pecan Cinnamon Rolls, it’s crucial to understand the role of each ingredient in the recipe. Let’s break down the key components that make these rolls irresistible.
The Dough
The foundation of any great cinnamon roll is the dough. Here’s a closer look at its essential ingredients:
– All-Purpose Flour: This versatile flour is crucial for providing the structure that allows your rolls to rise beautifully. The protein content in all-purpose flour strikes a balance, ensuring a soft and fluffy interior while maintaining enough strength to hold the shape of the rolls.
– Sugar: Not only does sugar add sweetness to the dough, but it also plays a key role in browning during baking. This results in that beautiful golden crust that we all love.
– Instant Yeast vs. Traditional Yeast: Instant yeast is a convenient choice for home bakers. It doesn’t require proofing, which means you can mix it directly into your dry ingredients. Traditional yeast, on the other hand, requires activation in warm water before mixing. Both can yield delicious results, but using instant yeast can save you time without compromising flavor.
– Salt: This often-overlooked ingredient is essential for enhancing the overall flavor of your rolls. It helps to balance the sweetness while also controlling the fermentation process of the yeast, ensuring a steady rise.
– Warm Milk and Melted Butter: The warmth of the milk activates the yeast, promoting a good rise in the dough. Meanwhile, melted butter adds richness and flavor, contributing to the delightful softness of the rolls.
– Eggs: Eggs not only enrich the dough but also improve its texture. They add moisture and create a tender crumb, making each bite of your cinnamon rolls melt in your mouth.
The Filling
The filling is where the magic truly happens, combining sweet and spicy flavors:
– Brown Sugar: This ingredient lends a deep caramel flavor to the filling. Its moisture content makes the rolls extra gooey and helps create that deliciously sticky center.
– Ground Cinnamon: The warmth of cinnamon is essential to any cinnamon roll recipe. It permeates the dough and filling, creating an inviting aroma and flavor that makes these rolls truly special.
– Softened Butter: This acts as the glue that holds the filling ingredients together. Spreading softened butter over the dough helps to bind the brown sugar and cinnamon, ensuring that each roll is packed with flavor.
– Chopped Pecans: These nuts add a delightful crunch and nutty flavor that perfectly complements the sweetness of the filling. Chopped pecans not only enhance the taste but also provide a pleasing texture contrast in every bite.
The Glaze
To elevate your Maple Pecan Cinnamon Rolls, a sweet glaze is the finishing touch:
– Powdered Sugar: This ingredient adds a smooth, creamy texture to the glaze. It dissolves easily and creates a sweet topping that’s perfect for drizzling.
– Pure Maple Syrup: The natural sweetness of maple syrup enhances the flavor profile of the rolls, adding a layer of richness that is simply irresistible. Always opt for pure maple syrup for the best taste.
– Adjusting Glaze Consistency: The consistency of your glaze can be adjusted with a splash of milk. Whether you prefer a thick glaze that sits atop the rolls or a thinner one that seeps into every crevice, you can easily customize it to your liking.
Step-by-Step Instructions
Now that we’ve covered the ingredients, it’s time to dive into the step-by-step process of making these delicious Maple Pecan Cinnamon Rolls. Follow these instructions carefully, and you’ll be on your way to baking perfection.
Preparing the Dough
1. Mixing Dry Ingredients: In a large mixing bowl, combine the all-purpose flour, sugar, salt, and instant yeast. Whisk them together until well combined. This step is crucial for evenly distributing the yeast and salt, which will ensure a uniform rise.
2. Combining Wet Ingredients: In a separate bowl, gently warm the milk until it is lukewarm to the touch (around 110°F or 43°C). Add the melted butter and eggs to the warm milk, whisking until fully incorporated. The warmth of the milk is essential for activating the yeast, so make sure it’s not too hot, as this could kill the yeast.
3. Forming the Shaggy Dough: Pour the wet ingredients into the dry ingredients. Using a wooden spoon or spatula, mix until the dough begins to come together. It will initially appear shaggy and messy, but this is perfectly normal. Once combined, turn the dough out onto a lightly floured surface.
Stay tuned for the continuation of this delectable journey as we guide you through the next steps of rolling, filling, and baking your Maple Pecan Cinnamon Rolls. With each step, you’ll be one step closer to enjoying these heavenly creations that are bound to impress family and friends alike.

Kneading to Perfection
Achieving the right dough consistency is crucial for your Maple Pecan Cinnamon Rolls. Start by mixing your ingredients until they come together, then transfer the dough onto a lightly floured surface. Knead the dough for about 8 to 10 minutes. The goal here is to develop the gluten, which gives the rolls their signature texture. To knead effectively, push the dough away from you with the heel of your hand, fold it over, and repeat. You’ll know the dough is ready when it feels smooth, elastic, and bounces back when poked.
Importance of Rising Time and Warm Environments
Rising time is equally important. After kneading, place the dough in a greased bowl, cover it with a damp cloth or plastic wrap, and let it rise in a warm, draft-free area until it doubles in size—this usually takes about 1 to 1.5 hours. The warmth helps the yeast activate and produce carbon dioxide, which causes the dough to rise. If your kitchen is cool, you can create a warm environment by placing the bowl in a slightly warmed oven (turned off) or near a heating element.
Creating the Filling
The filling is where the magic happens. Start by combining brown sugar and cinnamon in a bowl. Using dark brown sugar will provide a deeper, molasses-like flavor, but light brown sugar works just as well. Ensure the cinnamon is evenly mixed with the sugar to avoid clumping, which can result in uneven flavor distribution.
Preparing Butter to the Right Consistency
Next, prepare your butter. It should be at room temperature, soft enough to spread easily but not melted. This state allows you to spread it on the dough without tearing it, ensuring an even distribution of your filling mixture. If you forget to take the butter out in advance, you can soften it quickly by cutting it into small cubes and letting it sit for about 15 minutes.
Rolling Out the Dough
Once your dough has risen, it’s time to roll it out. Lightly flour your working surface and turn your dough out onto it. Use a rolling pin to flatten the dough into a rectangle, approximately 16 inches long and 12 inches wide. Aim for a thickness of about ¼ inch; this will ensure that the rolls are fluffy yet substantial.
Importance of Even Spreading of Filling Ingredients
When spreading the butter over the dough, use a spatula or the back of a spoon to cover the surface evenly. It’s essential to spread the filling ingredients evenly to ensure that each bite of the roll is flavorful. After the butter is applied, sprinkle the brown sugar and cinnamon mixture evenly over the surface, ensuring it reaches all corners.
Rolling and Cutting
Now that your filling is on, it’s time to roll the dough. Starting from the long edge closest to you, roll the dough tightly away from you, forming a log. The tighter you roll, the better the spiral in each roll will be. Once rolled, pinch the seam to seal it closed.
Tips for Tight Rolling and Sealing the Edges
To ensure your rolls maintain their shape, use a sharp knife or dental floss to cut them. For the best results, cut the log into 12 equal pieces, about 1.5 inches wide. You can use a serrated knife or, for a cleaner cut, wrap dental floss around the dough and pull it tight—this method avoids squishing the rolls and keeps them perfectly shaped.
The Second Rise
After cutting, prepare your rolls for their second rise. Place them cut-side up in a greased baking dish, ensuring there is enough space between each roll for them to expand. This final proofing allows the rolls to rise again, becoming fluffier and softer when baked.
Importance of Spacing in the Baking Dish
Proper spacing is crucial; if the rolls are too close, they will stick together and not achieve that desirable pull-apart quality. Cover the rolls again with a cloth and let them rise for another 30 to 45 minutes, or until they have puffed up significantly.
Baking the Rolls
Preheating your oven is an essential step that should not be overlooked. Set your oven to 350°F (175°C) about 15 minutes before you’re ready to bake. This ensures that your rolls start baking as soon as they hit the oven, promoting even cooking and a beautifully golden crust.
Signs of Doneness and Avoiding Over-Baking
Bake your rolls for 25 to 30 minutes, keeping an eye on them towards the end of the baking time. They should be golden brown, and a toothpick inserted in the center should come out clean. Avoid over-baking; you want them to remain soft and pillowy on the inside.
Making the Glaze
While your rolls are baking, you can prepare the glaze. In a medium bowl, combine powdered sugar, maple syrup, and a splash of milk or cream. Use a whisk to mix until smooth. Adjust the consistency by adding more milk for a thinner glaze or more powdered sugar for a thicker one, depending on your preference.
Mixing Techniques for a Smooth Finish
Ensure there are no lumps in the glaze by sifting the powdered sugar before mixing. This step guarantees a smooth, luxurious glaze that will beautifully coat your rolls.
Glazing and Serving
Once the rolls are out of the oven, allow them to cool for about 10 minutes before glazing. This waiting period ensures that the glaze doesn’t melt into the rolls but instead sits beautifully on top. Drizzle the glaze generously over the warm rolls for a stunning finish.
Presentation Ideas for an Inviting Brunch Setup
For an inviting brunch setup, consider serving your Maple Pecan Cinnamon Rolls on a rustic wooden board or a stylish cake stand. Garnish with chopped pecans or a sprinkle of cinnamon for added visual appeal. Fresh fruits or a side of whipped cream can also enhance the presentation and flavor profile.
Nutritional Information
For health-conscious readers, here’s a breakdown of the nutritional information per serving (1 roll):
– Calories: 320
– Total Fat: 15g
– Saturated Fat: 7g
– Carbohydrates: 45g
– Dietary Fiber: 2g
– Sugars: 20g
– Protein: 4g
These rolls are a treat, and while they may be indulgent, sharing them with friends and family makes them even more special.
Conclusion
Creating Maple Pecan Cinnamon Rolls is an enriching experience that combines the joy of baking with the delight of sharing delicious treats with loved ones. From the kneading of the dough to the final glazing, each step is filled with anticipation and satisfaction. This recipe not only brings a sense of accomplishment but also creates cherished memories around the breakfast table. Enjoy the delightful combination of flavors and textures, and make this a staple in your culinary repertoire. Whether for a holiday brunch, a weekend treat, or a special occasion, these rolls are sure to bring smiles and warmth to your home. Happy baking!
