
Introduction
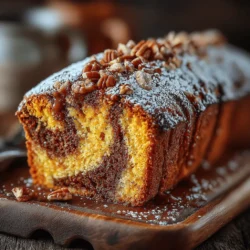
The Pumpkin Chocolate Marble Cake is a delightful blend of seasonal flavors and rich chocolate, making it the perfect dessert for fall gatherings, family dinners, or any special occasion. Combining the earthy sweetness of pumpkin with the decadent taste of chocolate, this cake is not only visually stunning with its beautiful marbled pattern but also incredibly moist and satisfying. In this article, we’ll explore the ingredients, step-by-step instructions, and the magic behind this cake, ensuring you have all the tools you need to create a masterpiece in your own kitchen.
Ingredients
– 1 cup pumpkin puree
– 1/2 cup vegetable oil
– 1 cup granulated sugar
– 1/2 cup brown sugar, packed
– 3 large eggs
– 2 cups all-purpose flour
– 1 teaspoon baking powder
– 1 teaspoon baking soda
– 1 teaspoon ground cinnamon
– 1/2 teaspoon ground nutmeg
– 1/2 teaspoon salt
– 3/4 cup unsweetened cocoa powder
– 1 cup hot water
– 1 teaspoon vanilla extract
Instructions
1. Preheat your oven to 350°F (175°C). Grease and flour a 9×13 inch cake pan or line it with parchment paper.
2. In a large mixing bowl, combine the pumpkin puree, vegetable oil, granulated sugar, brown sugar, and eggs. Mix until well combined.
3. In a separate bowl, whisk together the flour, baking powder, baking soda, cinnamon, nutmeg, and salt.
4. Gradually add the dry ingredients to the pumpkin mixture, mixing until just combined.
5. In another bowl, combine the cocoa powder and hot water, stirring until smooth. Add the vanilla extract and mix well.
6. In a separate bowl, combine the remaining dry ingredients for the chocolate batter: flour, baking powder, and salt.
7. Gradually fold the dry chocolate ingredients into the cocoa mixture until smooth.
8. To create the marble effect, alternate spoonfuls of the pumpkin batter and chocolate batter into the prepared pan. Use a knife or skewer to gently swirl the two batters together.
9. Bake in the preheated oven for 30-35 minutes, or until a toothpick inserted into the center comes out clean.
10. Allow the cake to cool in the pan for 10 minutes before transferring it to a wire rack to cool completely.
Understanding the Ingredients
The Base Components of Pumpkin Batter
– Pumpkin Puree: This is the star ingredient, contributing moisture and a subtle sweetness to the cake. Rich in vitamins A and C, pumpkin puree also adds nutritional value.
– Vegetable Oil: This helps to keep the cake moist and tender. Unlike butter, oil results in a softer crumb.
– Sugars: Both brown and granulated sugar play crucial roles in flavor and texture. Brown sugar adds moisture and a hint of molasses flavor, while granulated sugar provides sweetness.
– Eggs: Essential for binding the ingredients together, eggs also help with leavening, contributing to the cake’s rise.
– Spices: The combination of cinnamon and nutmeg adds warmth and aroma, evoking the essence of fall.
The Chocolate Batter Breakdown
– Unsweetened Cocoa Powder: This is key to achieving the deep chocolate flavor. It is different from sweetened cocoa powder and should not be substituted.
– Hot Water: Used to dissolve the cocoa powder, hot water helps to create a smooth batter and enhances the chocolate flavor.
– Baking Powder and Salt: These ingredients are crucial for the proper rise and flavor balance in the chocolate batter.
– Oils and Sugars: The combination of these elements not only adds richness but also ensures a moist texture in the final cake.
Preparation Steps for Your Marble Cake
Preheating the Oven and Preparing the Pan
– Preheat your oven to 350°F (175°C), which is the optimal temperature for baking a marble cake. This ensures even cooking and a perfect rise.
– Grease and flour your cake pan thoroughly or line it with parchment paper for easy removal after baking. This step is crucial to prevent sticking.
Creating the Pumpkin Batter
– Begin by mixing the wet ingredients: pumpkin puree, oils, and sugars. Ensure they are combined well to avoid an uneven texture.
– Gradually add the dry ingredients, mixing gently to avoid overmixing while ensuring a smooth batter. This will help maintain the cake’s light texture.
Crafting the Chocolate Batter
– For the chocolate batter, dissolve the cocoa powder in hot water carefully. This step is vital for achieving a velvety texture in your batter.
– Once combined, add the dry ingredients to the chocolate mixture, mixing until smooth. This will ensure a rich and decadent chocolate flavor that complements the pumpkin perfectly.
The Importance of Sifting Dry Ingredients for a Lump-Free Batter
Sifting your dry ingredients is a crucial step in achieving a light and airy cake. When you sift flour, cocoa powder, and any leavening agents, you break up clumps that may have formed and incorporate air into the mixture. This results in a smoother batter, which is essential for the even distribution of flavors in your Pumpkin Chocolate Marble Cake. Additionally, sifting helps ensure that your cake rises properly, leading to a tender crumb.
The Art of Marbling
Layering the Batters
Achieving the perfect marble effect in your cake relies heavily on how you layer the batters. Start by adding a layer of pumpkin batter to your prepared baking pan, followed by a layer of chocolate batter. Continue alternating between the two until both batters are used up. This method not only allows for a beautiful marbled appearance but also ensures that each slice reveals the delightful contrast between pumpkin and chocolate.
Techniques for Alternating Batters
To create the ideal marble effect, use a simple approach: pour dollops of each batter into the pan rather than spreading them out. This technique allows the batters to naturally blend without losing their individuality.
Tools You Can Use for Swirling
For the swirling process, a simple butter knife or skewer can work wonders. Insert the tool into the batter and gently swirl it through without overmixing. Be careful to maintain distinct layers while creating the marbling effect. The goal is to create a visually appealing pattern without fully blending the two batters.
Tips for Achieving the Perfect Marble Effect
Avoiding Overmixing
One of the key tips for achieving a stunning marble effect is to avoid overmixing the batters. Overmixing will cause the colors to blend too much, resulting in a uniform color rather than the desired marbled look. Aim for just a couple of gentle swirls to maintain the separation of the batters.
Visual Cues to Look For When Marbling
When marbling, keep an eye on the visual cues. You want to see a clear distinction between the pumpkin and chocolate batters. If the colors begin to merge too much, stop swirling immediately. The marbling should look intentional and artistic, not muddled.
Baking the Cake to Perfection
Baking Time and Doneness Tests
Baking your Pumpkin Chocolate Marble Cake typically takes between 50 to 60 minutes at 350°F (175°C). Keep a close watch during the final stages of baking. It’s essential to check for doneness, which can vary based on your oven and the size of your cake pan.
The Toothpick Test: How to Know When Your Cake is Ready
To ensure that your cake is baked perfectly, perform the toothpick test. Insert a toothpick into the center of the cake; if it comes out clean or with a few moist crumbs attached, your cake is ready. If the toothpick has wet batter clinging to it, continue baking for a few more minutes and check again.
Cooling and Removing the Cake
Allowing your cake to cool properly is vital for preserving its structure. After removing it from the oven, let it cool in the pan for about 10-15 minutes. Then, carefully transfer it to a wire rack to cool completely. To prevent sticking, run a knife around the edges before inverting the cake onto the rack.
Serving Suggestions and Presentation
Decorating the Cake
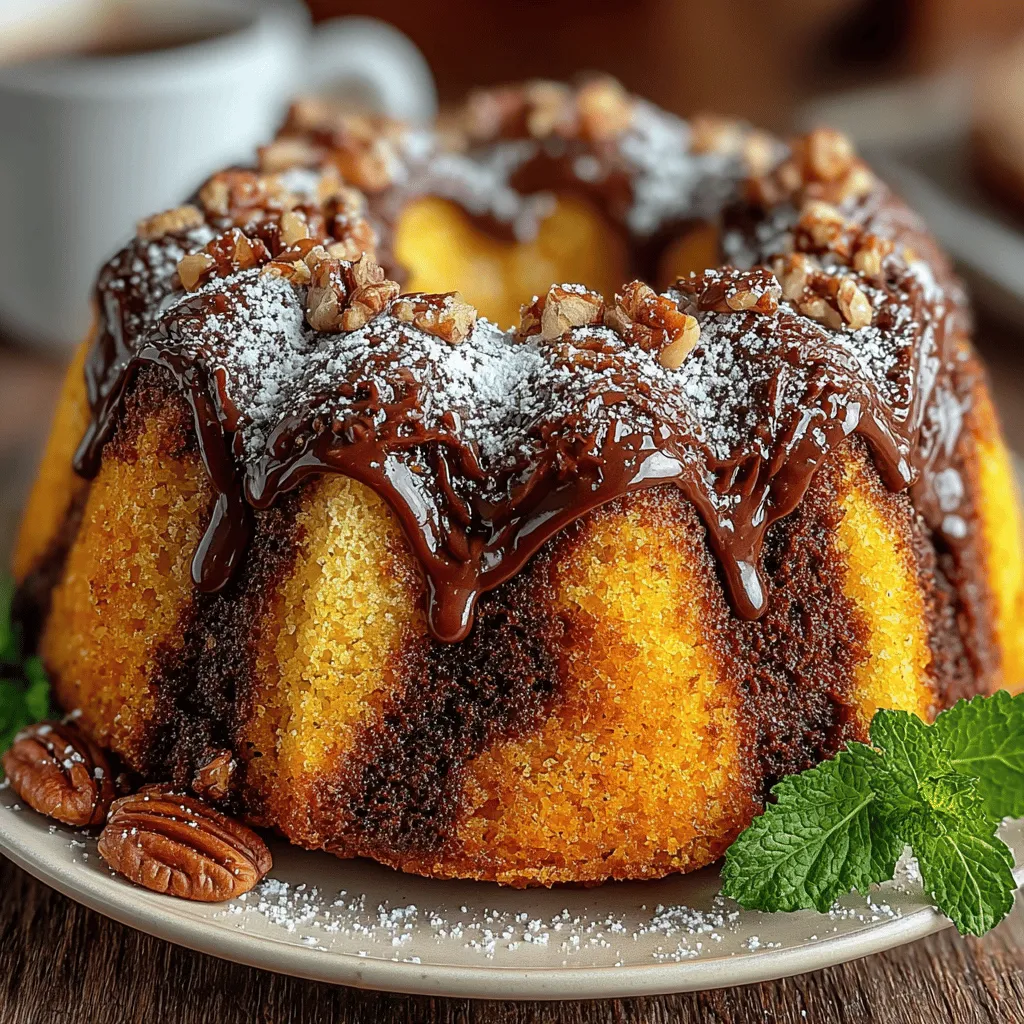
For a simple yet elegant finish, dust the top of your cooled cake with powdered sugar. You could also sprinkle chopped nuts, such as pecans or walnuts, for added texture and flavor.
Ideas for Serving
Pair your Pumpkin Chocolate Marble Cake with a dollop of whipped cream or a scoop of vanilla ice cream to enhance the dessert experience. The creaminess complements the flavors of pumpkin and chocolate beautifully, making each bite a delight.
Presentation Tips for Special Occasions
How to Plate the Cake for a Stunning Presentation
To create a show-stopping presentation, consider placing the cake on a decorative cake stand. Slice the cake into even pieces and arrange them on plates with a garnish of fresh mint or additional nuts for an appealing touch.
Suggestions for Garnishing That Enhance the Visual Appeal
Consider adding a drizzle of chocolate sauce over the top of the cake or around the plate to elevate the visual appeal. A few thinly sliced strawberries or orange zest can also provide a pop of color and freshness to your presentation.
Conclusion
The Pumpkin Chocolate Marble Cake is a wonderful way to celebrate the flavors of the season while indulging in a rich and satisfying dessert. With its unique combination of pumpkin and chocolate, this cake offers something for everyone and is sure to impress your guests. By following the outlined steps and tips in this article, you’ll not only create a delicious treat but also a beautiful centerpiece for any gathering. Enjoy the process of baking and the joy of sharing this delightful cake with your friends and family!