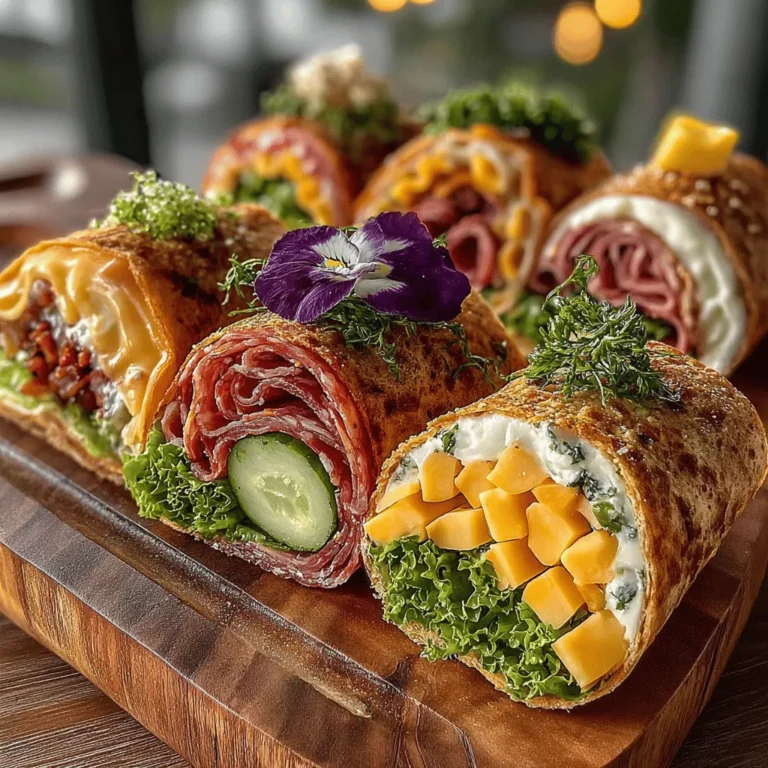
Charcuterie Board Wraps Recipe: A Deliciously Creative Twist on a Classic
In recent years, charcuterie boards have taken the culinary world by storm, captivating food enthusiasts with their artistic displays of meats, cheeses, and accompaniments. These beautifully arranged platters are not only a feast for the eyes but also a versatile option for entertaining, offering a little something for everyone. Whether you’re hosting a party, enjoying a cozy night in, or simply looking for a quick snack, charcuterie boards provide endless possibilities. However, as much as we adore the traditional spread, there’s a delightful new trend on the horizon: charcuterie board wraps.
Charcuterie board wraps take the essence of a charcuterie board and transform it into a portable, easy-to-eat format. Imagine all your favorite cured meats, artisanal cheeses, and colorful veggies neatly rolled into a soft tortilla or a spinach wrap. This innovative twist makes them perfect for gatherings, meal prep, or a tasty snack on the go. They’re not just a meal; they’re an experience, allowing you to enjoy the delightful combinations of flavors and textures in a convenient format.
Understanding Charcuterie Board Wraps
So, what exactly are charcuterie board wraps? Unlike the traditional setup, where ingredients are artfully arranged on a board, wraps condense the charcuterie experience into a handheld treat. Each wrap is a mini charcuterie board, bringing together a variety of flavors and ingredients in a single bite.
Charcuterie boards typically feature an assortment of cured meats, cheeses, fresh fruits, nuts, olives, and a selection of spreads. The beauty of charcuterie board wraps lies in their adaptability; you can customize them to fit your taste preferences, dietary restrictions, or even the season. The possibilities are virtually limitless, allowing you to mix and match ingredients for a unique flavor profile every time.
Essential Ingredients for Charcuterie Board Wraps
Creating delicious charcuterie board wraps starts with selecting high-quality ingredients. Here are the essential components you’ll need to craft the perfect wraps:
– Flour Tortillas and Spinach Wraps: These serve as the foundation for your charcuterie board wraps. Flour tortillas offer a mild flavor and a soft texture, while spinach wraps add a vibrant color and a hint of earthiness.
– Cream Cheese and Alternative Spreads: Cream cheese is a popular choice for adding creaminess and a subtle tang. However, you can also experiment with other spreads like pesto or hummus for a burst of flavor that complements your fillings.
– Variety of Deli Meats: Choose your favorites from an array of deli meats, such as salami, prosciutto, or turkey. These proteins add depth and heartiness to your wraps.
– Assorted Cheeses: Incorporating different types of cheese is essential to elevate the taste and texture of your wraps. Options like cheddar, gouda, and brie provide richness and complexity.
– Fresh Vegetables: Adding fresh vegetables not only enhances the visual appeal but also contributes crunch and color. Popular choices include cucumber, bell peppers, and radishes.
– Olives or Pickles: For a briny contrast, consider including olives or pickles. These elements add a delightful zing that balances the richness of the meats and cheeses.
– Optional Additions: To elevate your wraps further, think about including nuts and dried fruits. These additions can introduce new textures and flavors, making your wraps even more exciting.
When preparing your charcuterie board wraps, the importance of using fresh, high-quality ingredients cannot be overstated. The flavors of fresh produce, artisanal cheeses, and premium meats will shine through and significantly enhance the overall taste of your wraps.
Step-by-Step Instructions for Making Charcuterie Board Wraps
Preparation Phase
Before diving into the assembly of your charcuterie board wraps, it’s essential to prepare your workspace and ingredients properly. Here’s how to get started:
1. Gather Your Ingredients: Make sure you have all the selected ingredients laid out and easily accessible. This includes your tortillas or wraps, spreads, meats, cheeses, vegetables, and any optional add-ins.
2. Prepare Your Workspace: Clear a large, flat surface where you can assemble your wraps comfortably. You might want to use a cutting board or a clean countertop to give yourself ample space.
3. Soften the Cream Cheese: For easy spreading, soften your cream cheese by letting it sit at room temperature for about 15 minutes prior to use. You can also microwave it for about 10-15 seconds to achieve a smooth consistency, but be careful not to melt it.
4. Chop and Slice Your Ingredients: Take the time to prep your vegetables and cheeses. Slice cucumbers, bell peppers, and radishes into thin, manageable pieces. Cut your cheeses into slices or cubes that will fit nicely into the wraps. Having all ingredients prepped and ready to go will streamline the assembly process and allow for a more organized approach.
With your ingredients prepped and your workspace ready, you are now fully equipped to embark on the fun and creative journey of making your charcuterie board wraps. Stay tuned for the next part of this guide, where we’ll walk through the detailed steps for assembling these delicious wraps, ensuring you achieve a perfect balance of flavors and textures in every bite.
{{image_2}}
Creating delicious charcuterie board wraps involves more than just assembling ingredients; it’s about crafting an experience that tantalizes the taste buds and delights the eyes. Whether you’re hosting a party or looking for a quick snack, these wraps are versatile, easy to prepare, and sure to impress. Let’s dive into the details of how to create mouth-watering charcuterie board wraps that everyone will love.
Creating the Wrap
Step-by-Step Instructions
1. Prepare Your Ingredients: Start by gathering all your ingredients. You will need large flour tortillas or wraps, cream cheese, your choice of cured meats (like prosciutto, salami, or turkey), assorted cheeses (such as cheddar, gouda, or brie), and fresh vegetables (like arugula, spinach, bell peppers, or cucumbers). Feel free to add olives, nuts, or dried fruits for extra flavor and texture.
2. Spread the Cream Cheese: Using a spatula or butter knife, spread a generous layer of cream cheese over the entire surface of the tortilla. The cream cheese acts as a flavorful glue that holds everything together while adding a rich, creamy texture.
3. Layer Your Fillings: Start layering your ingredients on top of the cream cheese. Begin with your choice of meats, followed by cheese slices. Next, add fresh vegetables, ensuring they are evenly distributed across the tortilla. This arrangement not only enhances the visual appeal but also ensures that every bite is packed with flavor. For an extra burst of flavor, sprinkle some herbs like fresh basil or parsley over the layers.
Suggestions for Arranging the Fillings
For optimal flavor in every bite, consider the following arrangement tips:
– Balance Flavors: Alternate between savory and fresh ingredients. For instance, pair salty prosciutto with sweet bell peppers or creamy brie with crisp cucumber slices.
– Texture Variety: Incorporate different textures by mixing soft cheeses with crunchy vegetables and hearty meats.
– Color Contrast: Aim for a colorful presentation. Vibrant greens, reds, and yellows not only make the wrap more visually appealing, but they also indicate a variety of flavors.
Rolling Technique
Detailed Guidance on Rolling the Wrap
1. Start at One End: Begin rolling the tortilla tightly from one end. Make sure to tuck in the fillings as you roll to ensure they stay secure.
2. Keep it Tight: As you roll, pull the wrap towards you while keeping it snug. This helps maintain the integrity of the wrap, preventing it from falling apart when sliced.
3. Sealing with Cream Cheese: Once you reach the other end, use a little extra cream cheese to seal the edge of the wrap. This will help prevent it from unraveling and keep all those delicious fillings intact.
Importance of Sealing the Wrap
Sealing the wrap with cream cheese not only enhances the flavor but also serves as an effective adhesive. A well-sealed wrap can withstand slicing and serving without losing its structure, making it easier for guests to enjoy.
Serving Suggestions
Slicing the Wraps for Presentation
Once your charcuterie board wraps are rolled and sealed, it’s time to slice them for serving. Use a sharp knife to cut the wraps into bite-sized pieces, typically about 1 to 1.5 inches thick. This size allows for easy handling and sharing.
Ideas for Garnishing and Arranging
– Charming Platter Display: Arrange the sliced wraps on a large serving platter in a circular or spiral pattern. This method not only looks inviting but also encourages guests to grab and go.
– Garnish with Fresh Herbs: Add a sprinkle of fresh herbs like dill or parsley around the platter for a pop of color and aroma.
– Serve with Dips: Place small bowls of dips like pesto, hummus, or a yogurt-based sauce around the platter for guests to enjoy with their wraps.
Chilling the Wraps
For the best texture and flavor, chill your wrapped creations in the refrigerator for at least 30 minutes before serving. This helps the cream cheese firm up, making the wraps easier to slice and enhancing the overall taste.
Nutritional Benefits of Charcuterie Board Wraps
Charcuterie board wraps are not only delicious but also offer several nutritional benefits, depending on the ingredients used.
– Lean Meats: By selecting lean proteins like turkey or chicken, you can keep the wraps healthy while still satisfying your appetite.
– Fresh Vegetables: Adding a variety of vegetables boosts the nutritional value, providing essential vitamins, minerals, and fiber.
– Healthy Fats: Ingredients like cheese and nuts contribute healthy fats, which are essential for maintaining energy levels and overall health.
Portion Control and Dietary Flexibility
One of the standout qualities of charcuterie board wraps is their adaptability to various dietary preferences. For those looking for gluten-free options, consider using large lettuce leaves instead of tortillas. This alternative not only cuts down on carbohydrates but also adds a fresh crunch to each bite.
Pairing Suggestions for Charcuterie Board Wraps
To elevate your charcuterie board wraps, consider pairing them with complementary dips and beverages.
Dips and Sauces
– Pesto: A vibrant basil pesto adds a burst of flavor that pairs beautifully with the wraps.
– Hummus: This creamy dip is a healthy option that can enhance the overall taste and texture of the wraps.
– Savory Sauces: Consider serving with balsamic glaze or a tangy mustard for an added zing.
Beverage Pairings
– Wine: A crisp white wine like Sauvignon Blanc or a light red like Pinot Noir can enhance the flavors of the wraps.
– Sparkling Water: For a non-alcoholic option, sparkling water with a splash of lemon or lime can be refreshing and palate-cleansing.
Creative Variations of Charcuterie Board Wraps
The beauty of charcuterie board wraps lies in their versatility. You can easily adapt the ingredients to create unique flavor profiles or cater to different dietary needs.
Exploring Different Themes
– Vegetarian Wraps: Replace meats with roasted vegetables, grilled zucchini, and a variety of cheeses for a satisfying vegetarian option.
– Mediterranean-Inspired Wraps: Incorporate hummus, feta cheese, olives, and sun-dried tomatoes for a taste of the Mediterranean.
– Sweet Versions: Try creating dessert wraps with nut butters, banana slices, and a drizzle of honey for a delightful treat.
Encouragement to Experiment
Don’t hesitate to experiment with different ingredients and combinations based on personal preferences and seasonal availability. The key to delicious charcuterie board wraps is creativity and the joy of creating something special.
Conclusion
Charcuterie board wraps are the epitome of versatility and flavor, making them perfect for any occasion—from casual get-togethers to elegant parties. Their ease of preparation and customization potential means you can craft a wrap that suits your taste and dietary preferences.
As you gather your friends and family around the table, enjoy the process of creating and sharing these delicious wraps. The satisfaction of seeing smiles on the faces of your guests as they indulge in your culinary creation is priceless. So, roll up your sleeves, get creative in the kitchen, and dive into the delightful world of charcuterie board wraps!


